Brand and project headers, and the brand's assets
Keep guidelines, briefs, links, files and the brand's logo, fonts and colors in the header cards above the work, and choose who sees each card.
6 min readUpdated November 7, 2026
Video lesson: Brand & Project Headers
Overview
Every brand and every project has a header: a row of cards above its tasks for everything that isn't a deliverable. The brand header holds what is true for this client forever — guidelines, links, logos, fonts, b-roll. The project header holds what you are making right now — this month's brief, references and raw footage.
Write it once and a new editor reads it instead of sitting through a long onboarding call. Each card has its own permissions, so you decide whether only your team sees it or your client does too.
Open a header
- In the left sidebar, click a brand's name (or a project) to open its page.
- The header cards sit above the task views, arranged in titled sections such as Production and Management. If the header is collapsed, click its bar to expand it.
- Click a card to open it.
A new brand starts with a Guidelines card (rich text for the brand's rules) and a Brand Links card (named links such as the website, a drive and the client's socials). A project's header holds its Brief — the same text you see in Edit Project.
Add a card
- In any section of the header, click the dashed New page tile at the end of the cards.
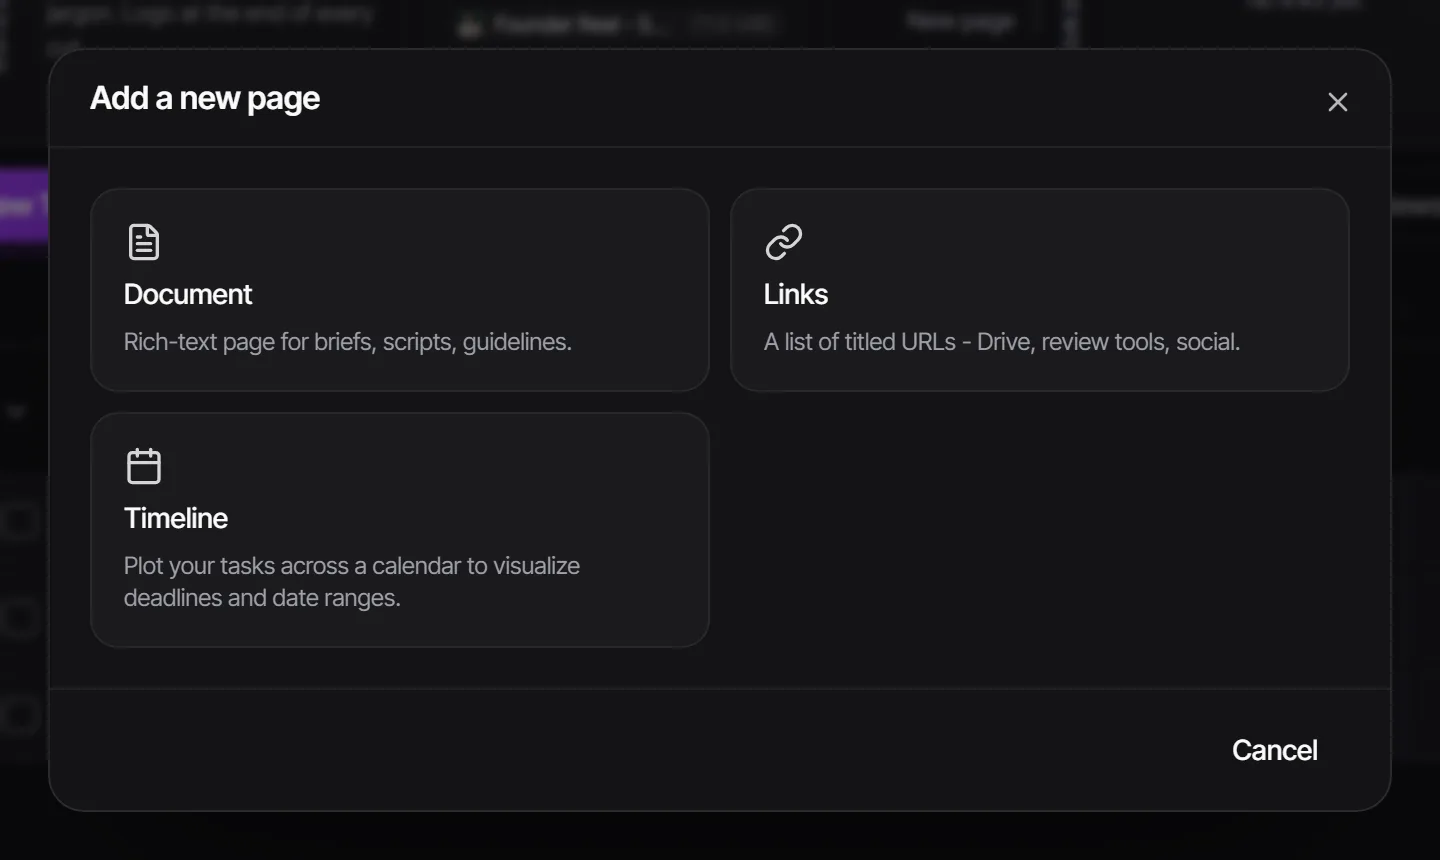
- In Add a new page, pick what goes inside the card (the list below).
- For a Document, click a template to preview it, then Use this template — or Blank for an empty page.
- To rename the card or change its icon, use its three-dot menu. Drag a card to move it within a section or into another one.
| Card | Use it for |
|---|---|
| Document | Briefs, scripts, guidelines and more, from templates such as Brief, Brand guidelines, Script, Shot list and Call sheet |
| Links | A list of named links — a drive, a review tool, social profiles |
| Raw footage (project) / Brand assets (brand) | A files area with folders, uploads and previews |
| Documents & attachments | Up to 5 files such as a contract or a price table |
| Timeline | On a brand, its projects across a calendar; on a project, its tasks by deadline or date range |
| Request forms | Deliverable requests from your client |
Team members can download a document card for someone outside Timeliner: open the card and use Download as Word or Download as PDF.
Choose who sees each card
- Open the card's three-dot menu (top-right corner of the card) → Card permissions.
- Pick a quick preset — Everyone, Internal team, Approvers + team or Admins only — or set each role to Hide, View, Edit or Delete one by one.
- Save. A section whose cards are all hidden from clients simply doesn't show for them.
Admins also see a button at the bottom of the panel named after the card type, such as Save as default for new Document cards. It adds the card, with these permissions, to every new brand you create (or, for a project's card, every new project). Existing cards stay as they are. All defaults are listed in Settings → Workflow → Templates → Header card defaults.
Project briefs are hidden from clients until an admin switches on Guest Brief Visibility in Settings → Clients & portal → What clients see. A single brand can override it in Edit Brand → Guest Access.
Keep the brand's files in Brand assets
Files you reuse in every project for this client — logos, b-roll, LUTs, music — belong in the brand's Brand assets card. Files from one shoot belong in that project's Raw footage card. The two are kept separate.
- A new brand has no files card yet. Click the New page tile in a Production section and choose Brand assets. A brand holds one.
- Open the card to upload files and folders, rename them and share them.
- Clients can download the files in a files card by default. A supervisor or admin can switch that off with Guests can download in the card's three-dot menu; clients can still view everything.
Put the essentials in every task
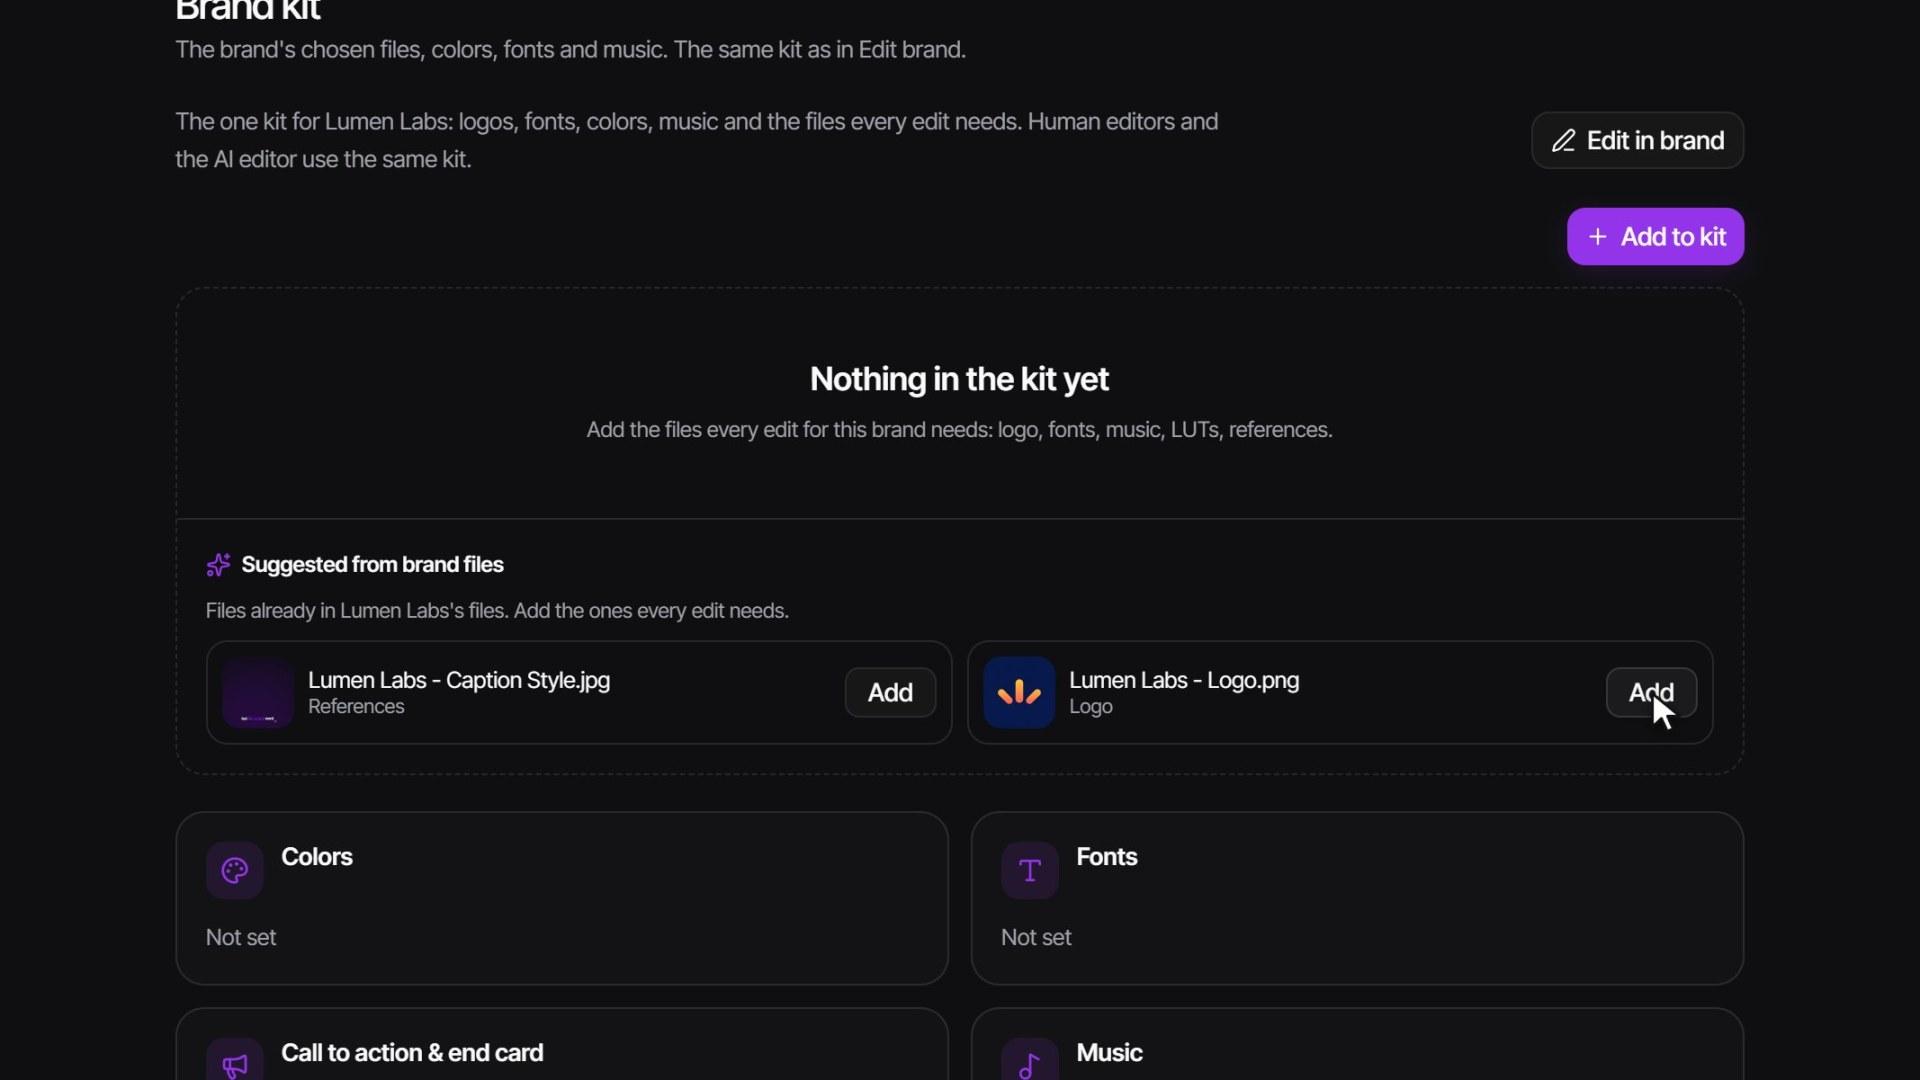
Editors shouldn't hunt through old drives for the logo or the right font. Each brand has one kit — also labelled Brand assets — that shows inside every task of that brand: chosen files plus the brand's Colors, Fonts, Background music and End card & CTA.
- Open any task of the brand, go to Plan and click Brand assets. (Admins and supervisors can also open Edit Brand → Brand assets.)
- Click Add to kit, pick a file from the brand's files and choose what it is used as, such as Logo or B-roll & footage. Adding doesn't move or copy the file.
- Supervisors and admins fill in Colors, Fonts, Background music and End card & CTA right in their tiles.
- Editors click any file to preview it over the task, or Download kit for one zip sorted by category.
Removing a file from the kit only takes it out of the kit, on every task of the brand. The file itself stays in the brand's files. From a task, Edit in brand takes admins and supervisors to the brand's settings.
Next to it, Scripts & captions shows how scripts and post captions for this brand are written. Admins and supervisors edit it in Edit Brand → Scripts & captions.
Who can do this
| Action | Admin | Supervisor | Editor | Client |
|---|---|---|---|---|
| Read header cards | Yes | Unless a card hides it from them | Unless a card hides it from them | Only cards their role may view |
| Add cards | Yes | Yes | Yes | No |
| Edit, rename or delete a card | Yes | As the card's permissions allow | As the card's permissions allow | As the card's permissions allow |
| Card permissions and Share | Yes | Yes | No | No |
| Save a card as a default for new brands or projects | Yes | No | No | No |
| Add or remove kit files | Yes | Yes | Yes | No |
| Edit colors, fonts, music and end card | Yes | Yes | No | No |
Client approvers can edit the brand's guidelines and links cards, even through a share link, when those cards are visible to them. Card permissions decide what each client role sees.
Watch it

Questions people ask
Where is the Files tab for a brand?
There isn't one. A brand's files live in its Brand assets header card. If you don't see it, add it from the New page tile in a Production section.
Should raw footage go in the brand or the project?
Files you'll reuse for this client in every project go in the brand's Brand assets. Footage from one shoot goes in that project's Raw footage card.
Can my client see the header cards?
Only the cards whose permissions let clients see them. Use the card's Card permissions → Internal team to keep a card team-only.
If I remove a file from the kit, is it deleted?
No. It leaves the kit on every task of the brand, but the file stays in the brand's files.
Can every new project start with the same cards?
Yes. An admin opens a card's Card permissions and clicks the button at the bottom named after the card type, such as Save as default for new Document cards. Every new brand (or, for a project's card, every new project) then starts with it.
Still stuck?
Ask Janet, the assistant inside Timeliner, email our team, or ask the community on Discord. We answer every message.