Request forms: let clients order new work
Build a request form with your deliverables catalog, share it with clients, and turn each approved request into a project with briefs.
5 min readUpdated November 7, 2026
Video lesson: Request forms (briefs)
Overview
Requests buried in WhatsApp and email get lost. A request form gives your clients one place to ask for new work: they pick deliverables from your catalog, answer your questions, attach footage and references, and submit.
Each submission lands in your Inbox as a structured request. When you approve it, Timeliner creates the project (or adds tasks to an existing one), with the client's answers written into the brief, so nobody retypes anything.
Request forms come with the Agency plan and higher, in workspaces whose template includes client review. See pricing.
Turn on client intake
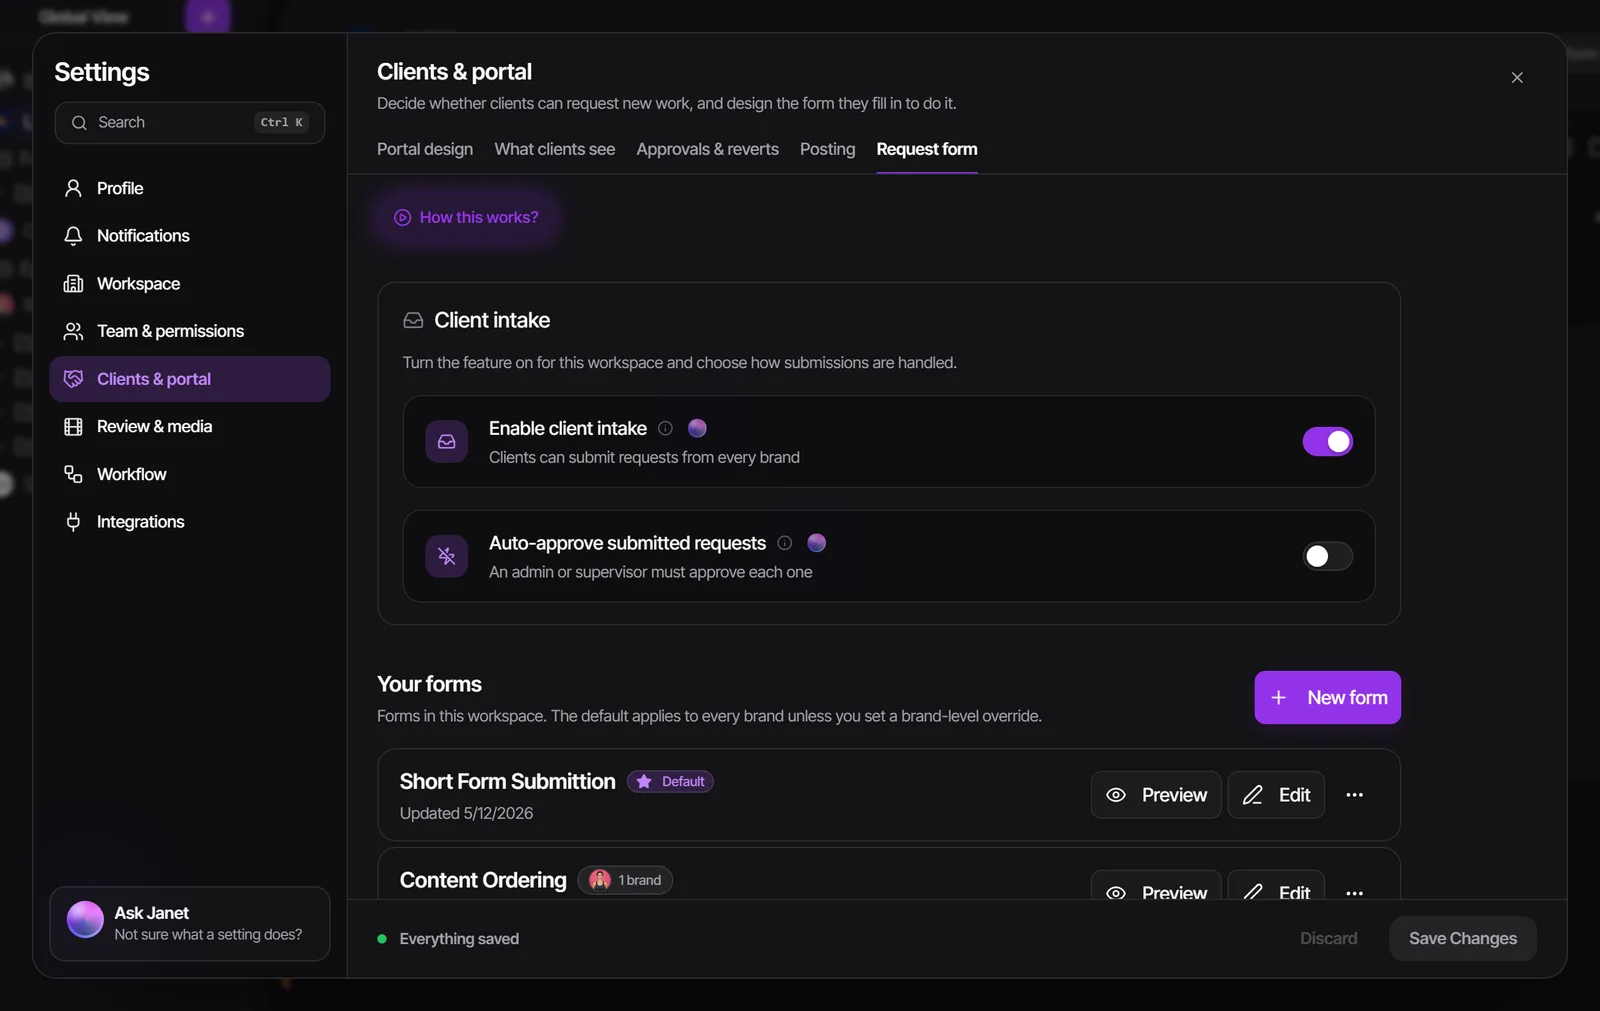
- Open Settings → Clients & portal → Request form.
- Switch on Enable client intake and click Save Changes. It is off by default, and while it's off no brand shows a form.
- Leave Auto-approve submitted requests off unless you want every submission to become a project the moment it's sent.
Build a form
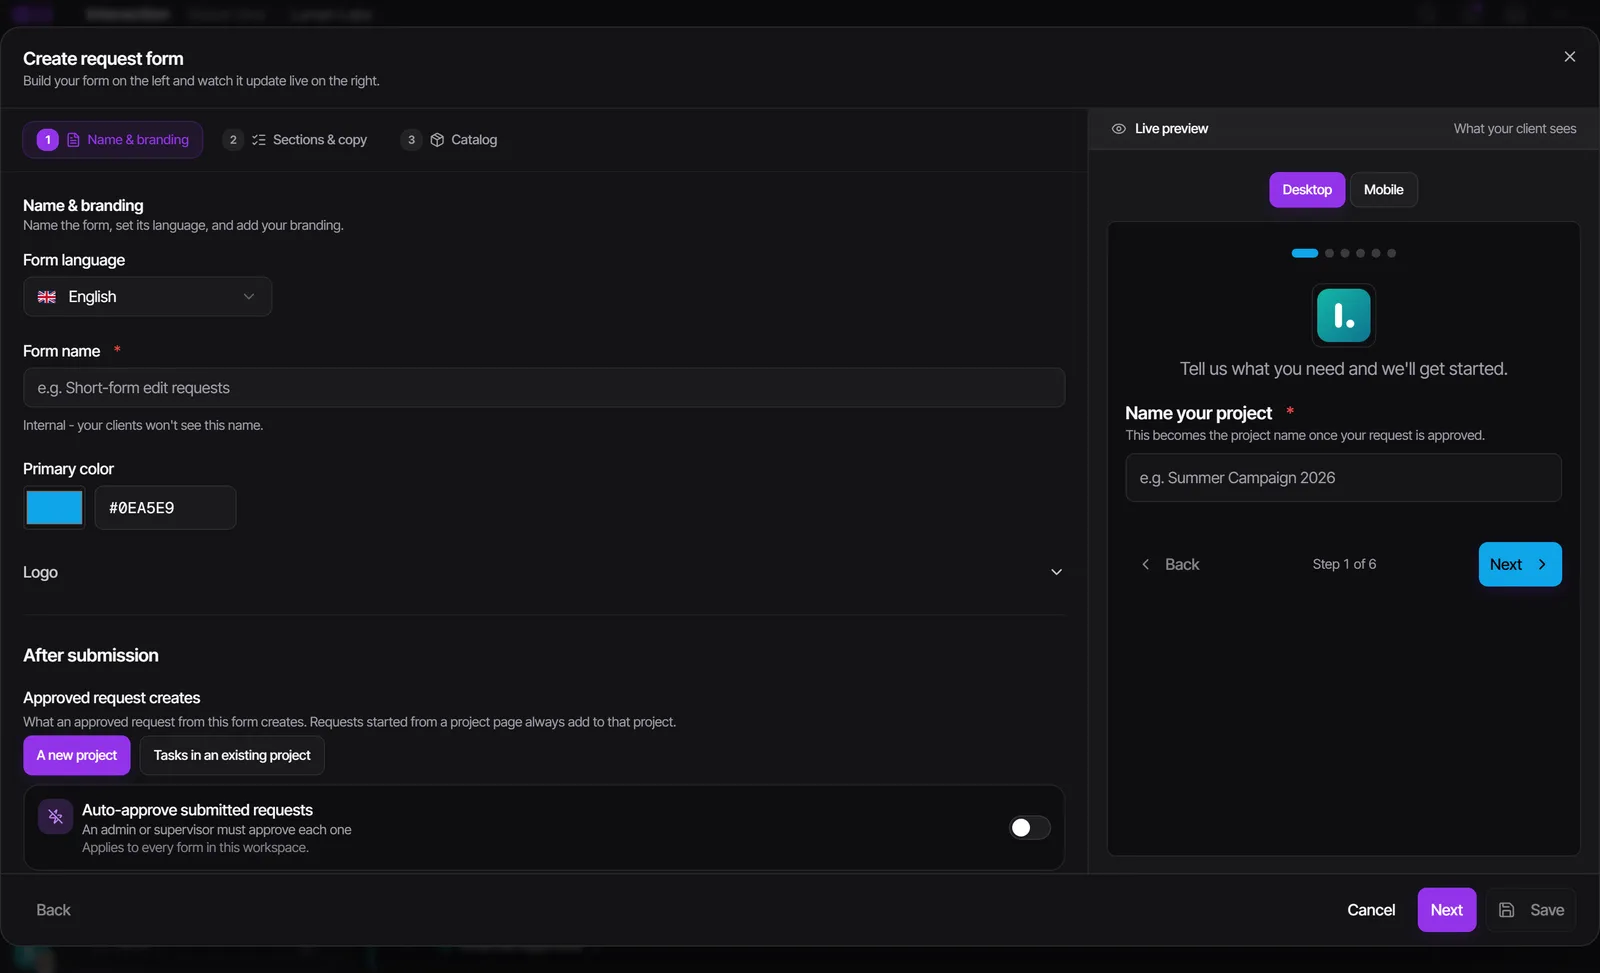
Click New form. The builder has three steps and a live preview of what your client will see.
- Name & branding: set the Form name (only your team sees it), your logo and Primary color, the Form language, a Thank-you message, and what an Approved request creates: A new project or Tasks in an existing project.
- Sections & copy: choose Simple sections (deliverables catalog, requested deadline, goal, central message, required inclusions, free notes) or a Custom form. In a custom form, use Start from a template (Standard brief or Social brief) or Add a field. Fields can be Required or Admin only and grouped into steps; a date question can Fill in a date column, such as the deadline.
- Catalog: add what clients can order (see the next section).
- Save the form.
A workspace can hold several forms. Each form's menu has Edit, Preview, Duplicate, Set as workspace default, Manage brands (which brands use it), Copy form link and Test form. A test submission is marked "Test", sends no notifications and can be deleted.
The Form language sets the form's built-in wording, error messages and dates. A Hebrew or Arabic form reads right to left.
Set up your deliverables catalog
- On the Catalog step, use Start from a preset for ready-made photo and video deliverables, or Add a deliverable from scratch.
- Give it a title and description, then a Linked pricing template (optional) or a flat unit price. Turn on Show price to client if they should see it.
- Optional: pick an Auto-assign editor, set a Maximum per request, and Upload preview for an image or short video on the card.
- Turn on Ask for a task name so the client names each unit, and Ask for a brief for each one (with Make it required) to collect a brief per deliverable.
Each brief the client writes lands in that task's Plan → Task brief. A form that adds tasks to an existing project must collect deliverables; until it does, an amber note explains how to fix it in one click.
Share the form with clients
- Share form on the brand's header gives a form-only link and Embed on your site code for your website. The link lasts a year.
- Copy form link in Settings gives a link through the brand's share page. Assign the form to the brand first.
- Signed-in clients (approvers and commenters) find Request work on their brand page, or Requests → Ask for new work.
- Visitors on a brand's share link use its Requests tab without an account. Allow work requests in the brand's portal settings or a link's advanced options hides it.
What your client sees
The form opens as a short step-by-step wizard with Back and Next. Required questions must be filled before moving on. A final review step reads back every answer before the client submits.
Attachments, including multi-gigabyte raw footage, upload in the background with a progress bar, and submit stays off until they finish. Large files resume where they stopped after a dropped connection. On approval, raw footage lands in the project's raw files and references in its assets, each request in its own folder.
On their Requests page clients see each request's status (Draft, In review, Approved or Needs changes) and, if you sent it back, your reason, so they can fix it and resubmit.
Review and approve a request
- Open Inbox in the top bar → Client brief requests. Submitted requests show by default.
- Open a request. Adjust lets you change quantities, set internal deadlines per item and edit the brief; click Done adjusting when finished.
- Under Destination, pick a new project under the brand or an existing project of that same brand.
- Click Approve. The panel previews exactly what it creates: one task per unit, with the catalog's pricing template and auto-assigned editor applied, and the client's answers in the project's brief.
- To send it back instead, click Reject, write a reason and click Reject request. The client sees the reason.
Every request has a comment thread both sides can see. Submitting notifies admins and supervisors; approving or rejecting notifies the client.
Automate what happens next
In Automations, the trigger A client request is approved runs once for each new task, and can be limited to one form or to particular answers. A client request comes in with Send to brand files the new project under another brand. Your own choice under Destination always wins. See Automations.
Who can do this
| Action | Who |
|---|---|
| Turn on intake, build and share forms | Admins and supervisors |
| Review, approve or reject requests | Admins and supervisors |
| Submit a request | Approver and commenter clients, anyone on a brand's share link (unless hidden), and anyone with the form link |
| See requests | Editors don't get the Client brief requests section; viewer clients can't request work |
Questions people ask
Can I put the request form on my website?
Yes. Share form on the brand's header gives Embed on your site code as well as a form-only link.
Does a request create a project automatically?
Only after you approve it, unless an admin turns on Auto-approve submitted requests. Then each submission becomes a project straight away and is marked Auto-approved.
Can clients see prices?
Only for catalog items where Show price to client is on.
Can different brands use different forms?
Yes. Use Manage brands in a form's menu to pick its brands; the workspace default covers every other brand.
Can my client upload huge raw files through the form?
Yes. Uploads run in the background, and large files resume where they stopped if the connection drops.
Still stuck?
Ask Janet, the assistant inside Timeliner, email our team, or ask the community on Discord. We answer every message.