Integrations, API and MCP
Connect Claude or ChatGPT over MCP, create API keys and webhooks, send review notes to Premiere Pro as markers, and bring files in from other tools.
5 min readUpdated November 11, 2026
Video lesson: Timeliner MCP (Claude & GPT)
Overview
Timeliner connects to the tools around it in four ways: AI assistants like Claude and ChatGPT over the Timeliner MCP, your own systems through the public API and webhooks, editing software through comment markers, and the files you already keep elsewhere.
The MCP connection, API keys and webhooks are set up by a workspace admin, on the Agency and Scale plans. Marker exports work for anyone who can see a video's comments, on every plan.
Connect Claude or ChatGPT (MCP)
Once connected, you can ask your assistant about your real workspace ("What's waiting on my client?", "What's late this week?", "Which videos worked best for this brand?") and ask it to make changes, such as moving a task to approved. It only ever sees this one workspace.
- Open Settings -> Integrations -> API & webhooks.
- On the Timeliner MCP card, copy the Server URL.
- In Claude.ai, go to Settings → Connectors → Add custom connector. In ChatGPT, go to Plugins → Add → Add custom MCP server. Paste the URL there.
- Sign in to Timeliner when asked. No key is needed.
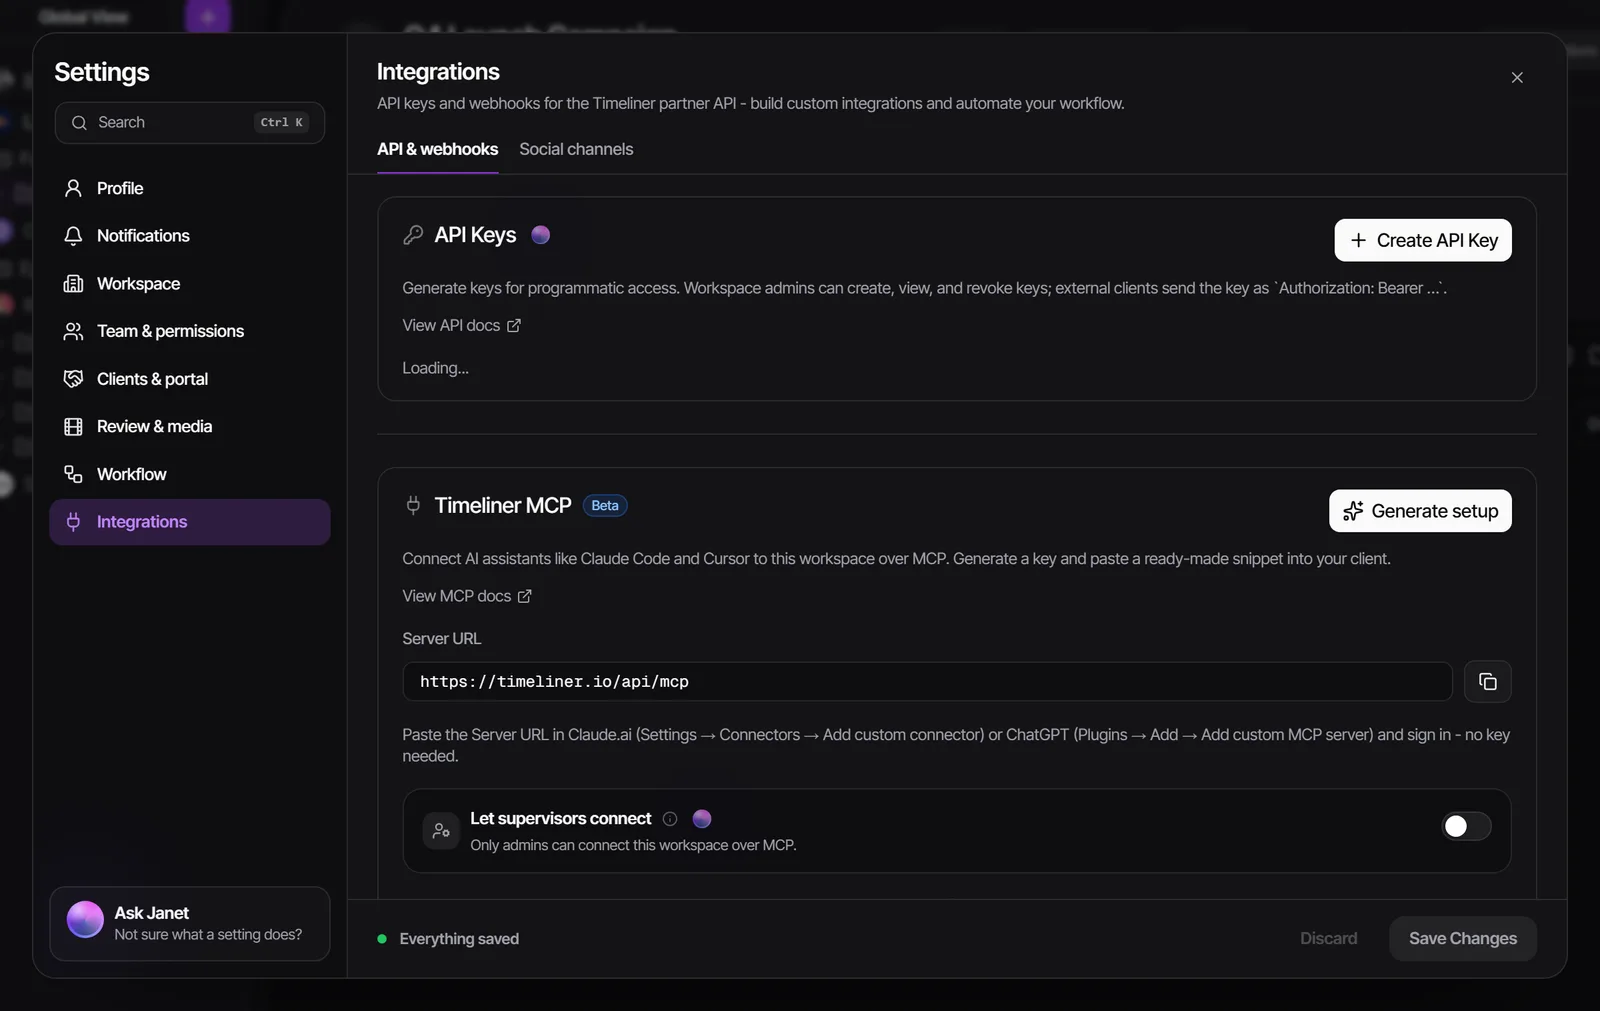
- Claude Code or Cursor: click Generate setup and copy the ready-made command or configuration snippet. The key inside it is shown once, so copy it before you close the window.
- Supervisors: only admins can connect at first. An admin can turn on Let supervisors connect on the same card. An MCP connection can read and change workspace data, so turn it on only for people you trust with that.
- Every tool the MCP offers, with examples, is listed in the MCP docs.
Create an API key
The Timeliner API reads and writes the same workspace, project, task, file, post and payment data you see in the app. Use it to connect a CRM, a form tool or your own scripts. There's no ready-made app for tools like Zapier or GoHighLevel, but any tool that can send web requests can use the API.
- Open Settings -> Integrations -> API & webhooks and find API Keys.
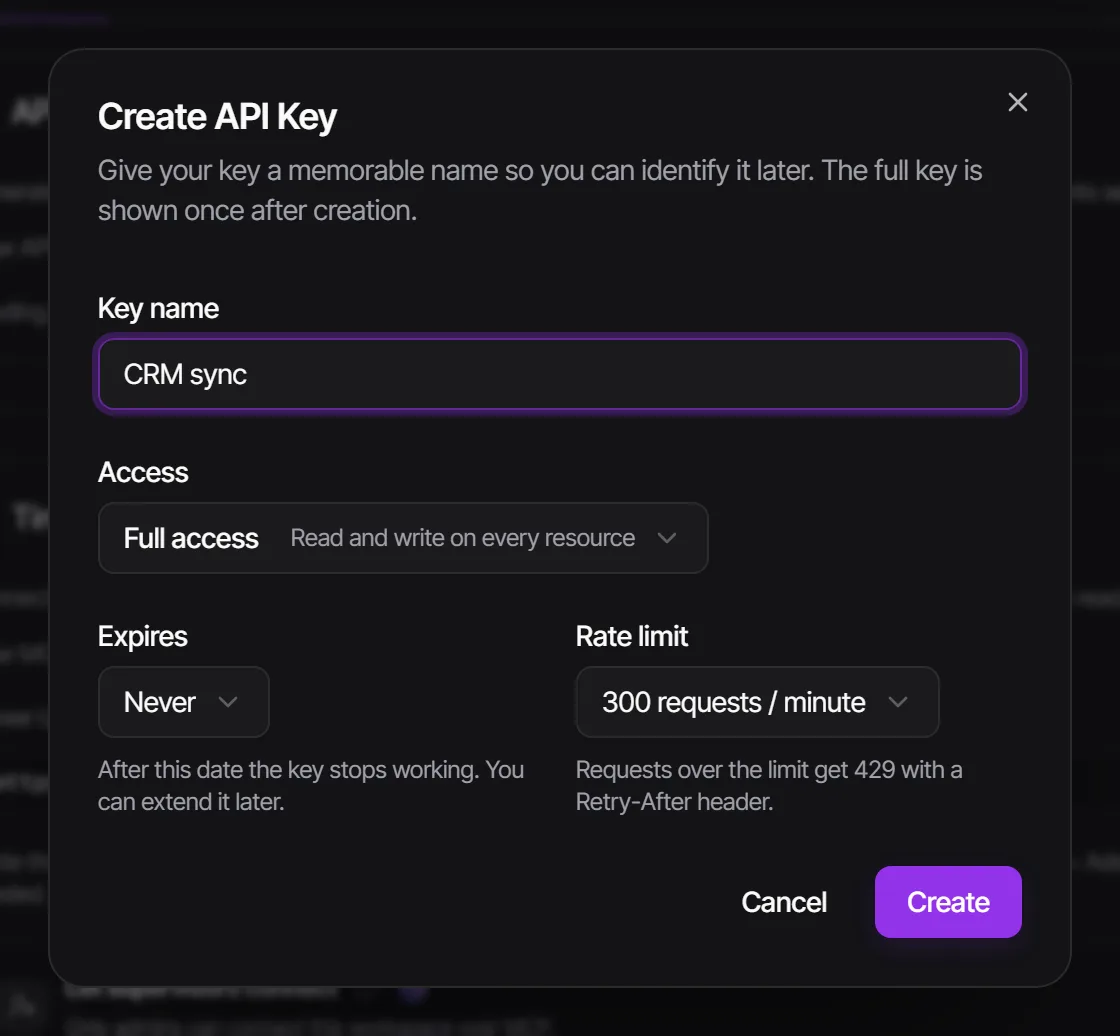
- Click Create API Key and give it a name you'll recognise later, such as the tool it is for.
- Under Access, choose Full access, Read-only or Custom (read or write per resource). Set when it Expires and its Rate limit if you need to.
- Copy the key right away. It is shown only once; after you click I've saved it, close, it can't be shown again.
- Each key works for one workspace only. Send it as a Bearer token. The full reference, with every endpoint, is in the API docs.
- Requests on a key shows its last 50 calls. Revoke stops a key at once.
- A key is revoked automatically if the person who created it leaves the workspace or stops being a manager, so create a replacement for any tool that stops working.
Get notified with webhooks
A webhook sends a message to your own address the moment something happens in Timeliner, for example when a task is approved or a client submits a request form.
- In Settings -> Integrations -> API & webhooks, find Webhooks and click Add Webhook.
- Paste your Endpoint URL (it must start with https).
- Tick the events you want, then save.
- Copy the signing secret right away; it is shown once. Use it to check the X-Timeliner-Signature header on each message.
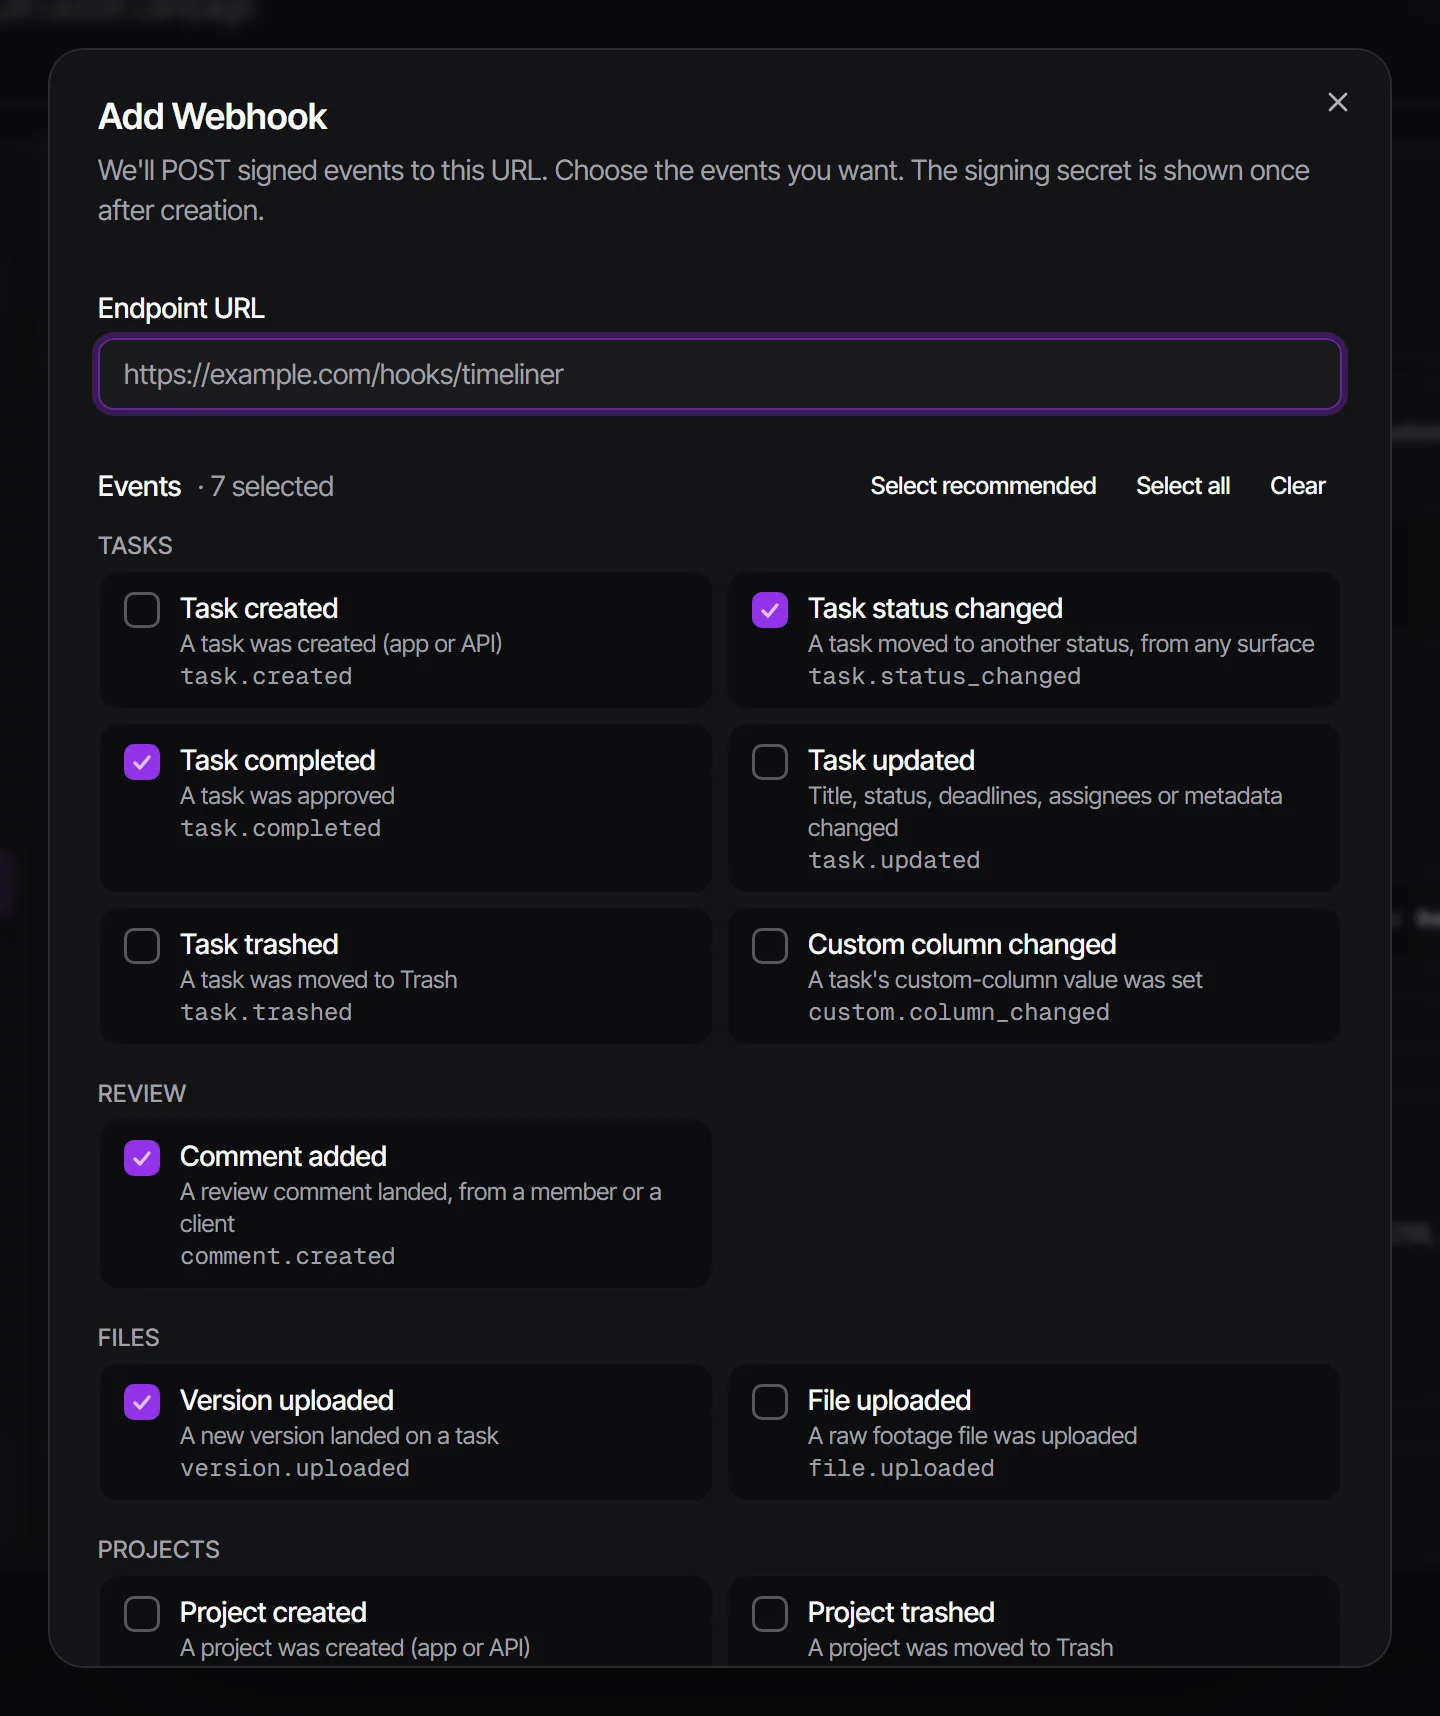
Events cover tasks (created, status changed, completed, updated, trashed, custom column changed), review (comment added, version uploaded), files, projects, publishing (post status changed, published, failed), clients (request form submitted, share link opened), the team (member invited, joined), money (payment recorded, voided) and time tracking (time entry created, updated, deleted). Each webhook can be paused, resumed, given a new secret with Rotate secret, or deleted.
Automations can call a webhook too. An Automations rule's Call a webhook action sends a message when the rule runs. See Automations.
Send review notes to Premiere Pro, Resolve or Final Cut
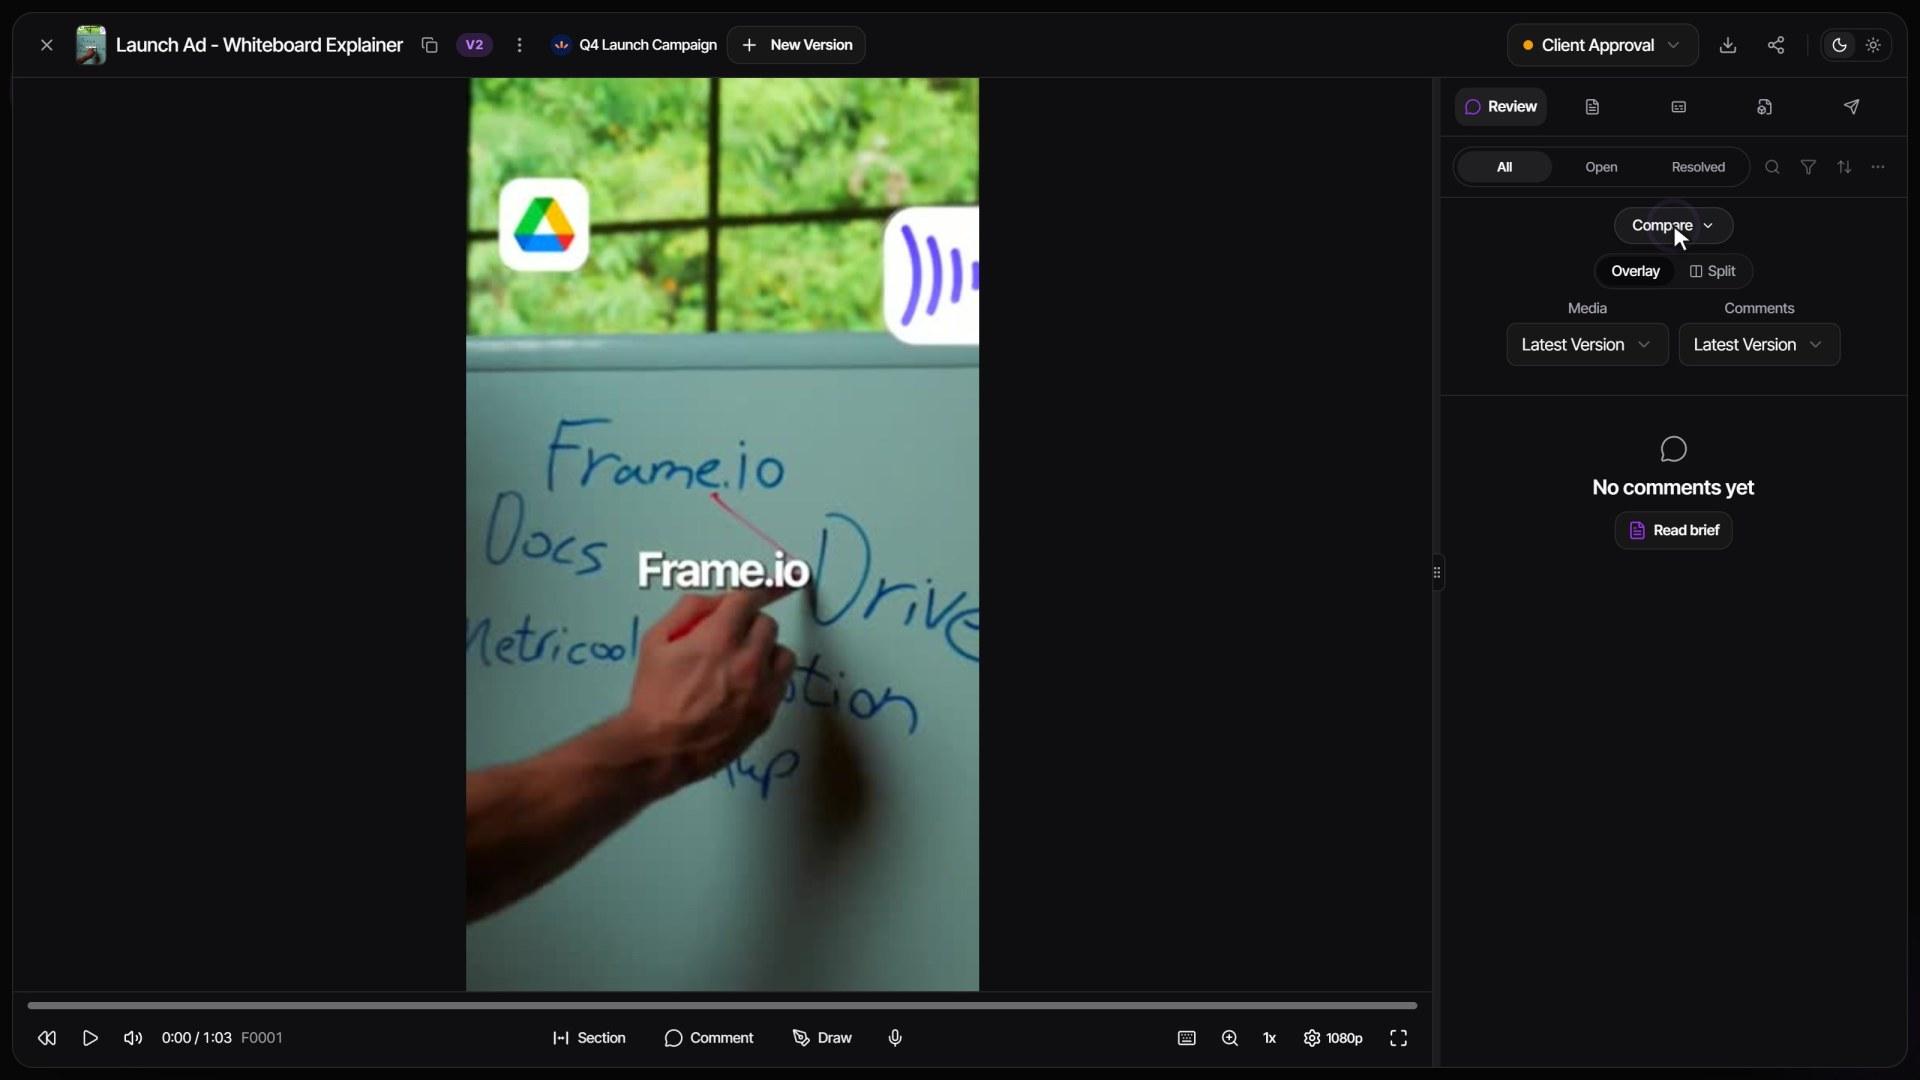
- Open the video for review. If the notes are on an earlier version, switch the comments to that version first.
- Open the three-dot menu at the top of the comments panel.
- Click Export markers for Premiere Pro, Export markers for DaVinci Resolve or Export markers for Final Cut Pro.
- Import the downloaded file in your editing software. Each timecoded note becomes a marker on the frame it was left on.
The export holds exactly what the panel shows, so filter to one reviewer or to open comments first if you only want those. Voice memos, general comments and replies are left out. The same menu also exports SRT, CSV and a printable PDF of the comments.
Bring files in from Google Drive, Dropbox or Frame.io
- There is no general built-in import from Google Drive, Dropbox or Frame.io. Download the files and upload them; in a project's Raw footage, Add -> Upload Folder keeps every subfolder.
- Some workspaces have Import from Google Drive in the Add menu of Raw footage as an early beta. If you don't see it, it isn't on for your workspace yet.
- Moving a whole agency over? Our team can move everything for you for a one-time fee. Book a call from the avatar menu: Get Help -> Book Onboarding Call.
- Frame.io comments and versions don't carry over; only the files do.
Other connections
- Slack and WhatsApp notifications: see Notifications.
- Social media accounts (Instagram, Facebook, TikTok, YouTube, LinkedIn) connect per brand: see Connect social accounts.
- Google Calendar, Outlook or Apple Calendar: each team member can subscribe to their own Workload schedule. See Workload and capacity.
Who can do this
| What | Who | Plan |
|---|---|---|
| Connect Claude or ChatGPT (MCP) | Admins; supervisors if an admin allows it | Agency and Scale |
| API keys and webhooks | Admins | Agency and Scale |
| Export markers, SRT, CSV, PDF of comments | Anyone who can see the comments, clients included | Every plan |
Watch it
Questions people ask
Do I paste an API key into Claude.ai or ChatGPT?
No. Paste the Server URL and sign in to Timeliner. Keys are only for Claude Code, Cursor and your own scripts.
Can I connect Zapier or GoHighLevel?
There is no ready-made app, but both can call the Timeliner API with an API key, and webhooks can send Timeliner events to them.
I lost my API key. Can I see it again?
No, a key is shown only once. Revoke the old one and create a new key.
Does the API work on the Studio plan?
No. API keys, webhooks and the MCP connection come with the Agency and Scale plans.
Can my editor get every client note as markers in Premiere Pro?
Yes. In the comments panel's three-dot menu, click Export markers for Premiere Pro and import the file in Premiere.
Still stuck?
Ask Janet, the assistant inside Timeliner, email our team, or ask the community on Discord. We answer every message.